Save the Dates!
This was NOT on my list of DIY projects, but instead was brought about by necessity! My engagement photo shoot was rained out and I didn't have a rain plan, so I looked around for cute ways to share my "save-the-date" information without a professional photograph. Someone suggested that I use a photobooth style strip of photos. I loved that idea and ran with it.
First, I googled "photo booth strips" so that I could get a visual on what exactly a photobooth strip looks like. Sure, I had a general idea, but this way my creation could look as authentic as possible.
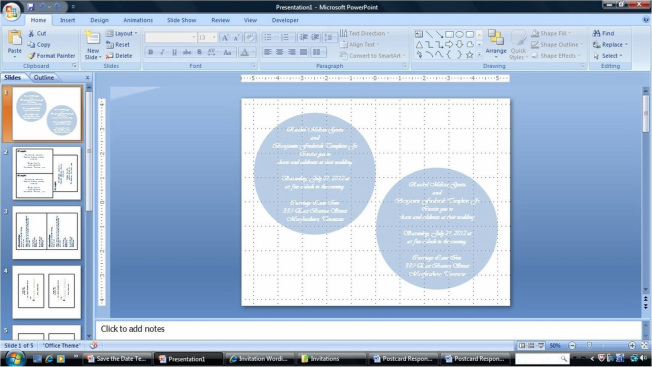
Next, I started sketching. I drew out the shape of my invitation. Then, I made up my idea using MS Powerpoint. Why Powerpoint? Why not? It's on more computers than MS Publisher, so it's more transportable, and the only difference between the two programs is that publisher has more layouts and templates.
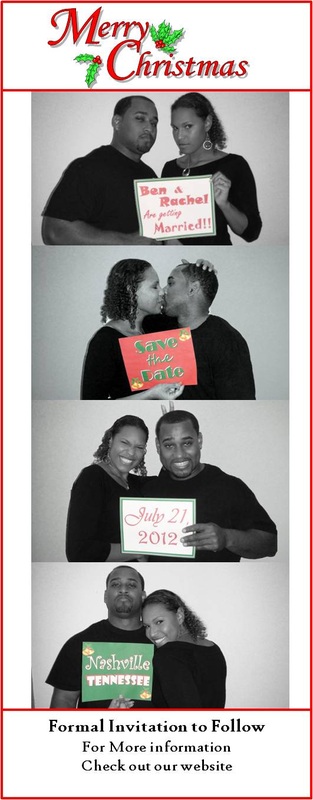
Here's my first design:
First, I googled "photo booth strips" so that I could get a visual on what exactly a photobooth strip looks like. Sure, I had a general idea, but this way my creation could look as authentic as possible.
Next, I started sketching. I drew out the shape of my invitation. Then, I made up my idea using MS Powerpoint. Why Powerpoint? Why not? It's on more computers than MS Publisher, so it's more transportable, and the only difference between the two programs is that publisher has more layouts and templates.
Here's my first design:
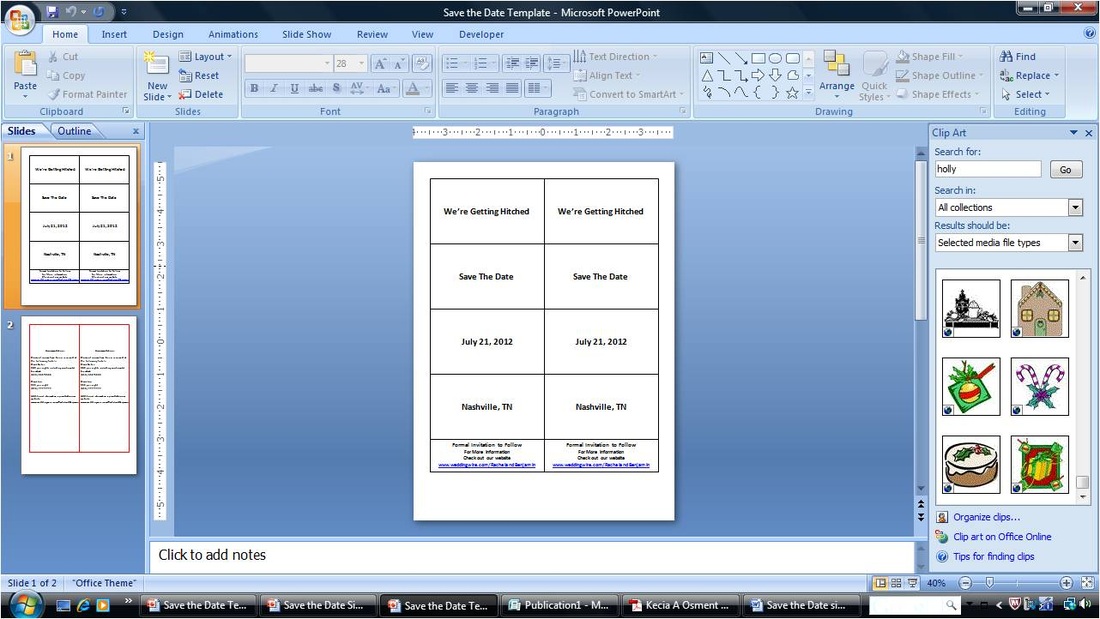
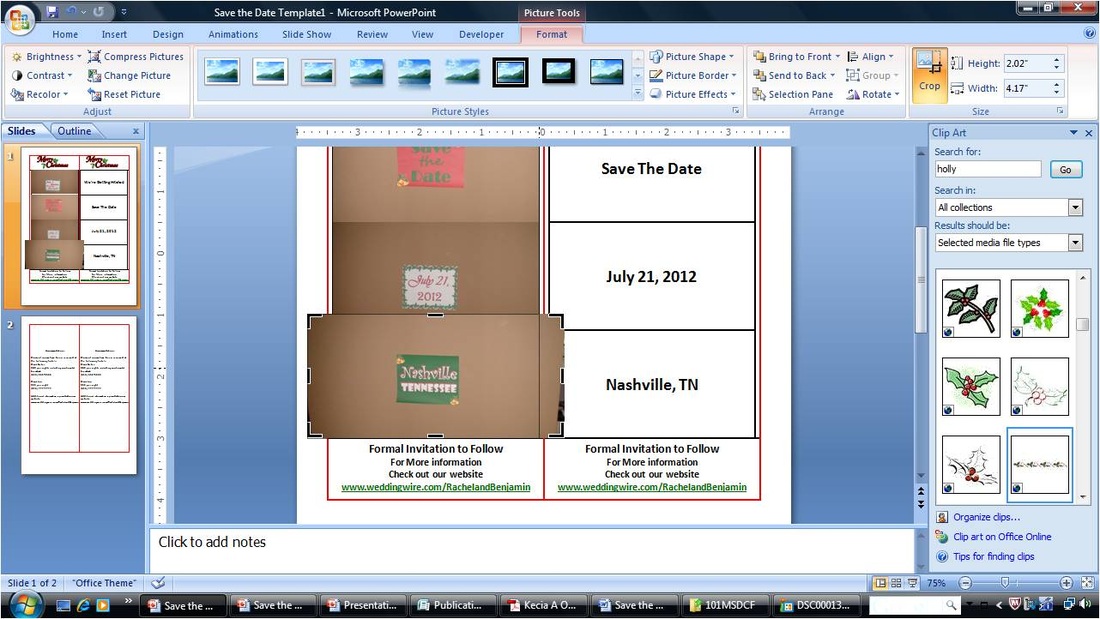
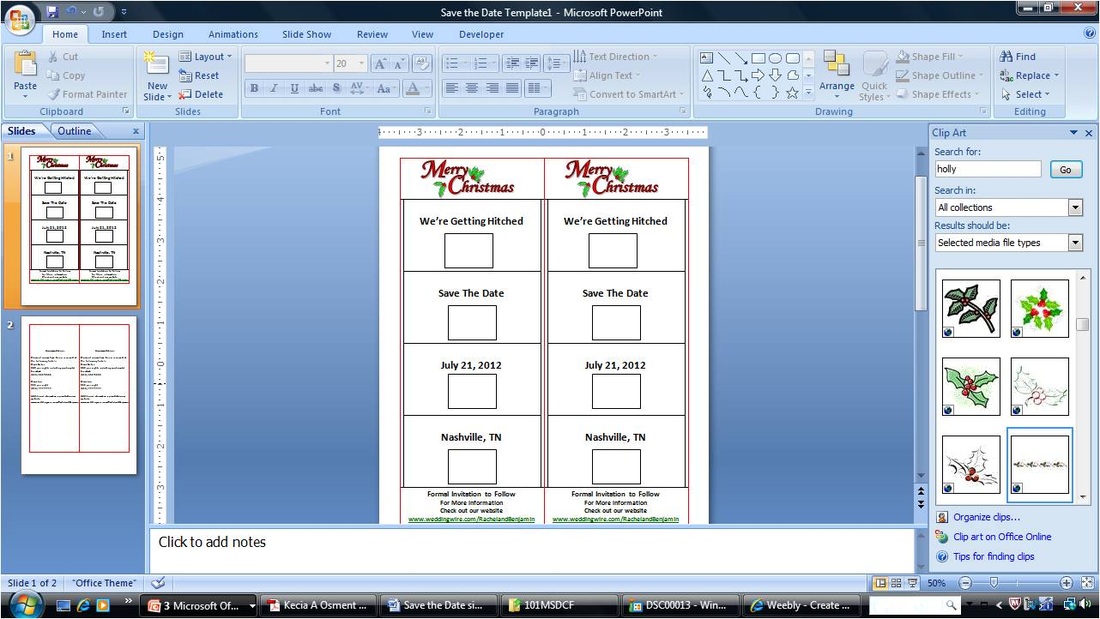
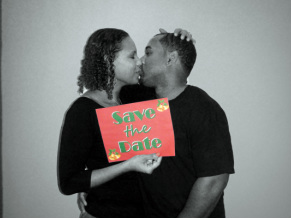
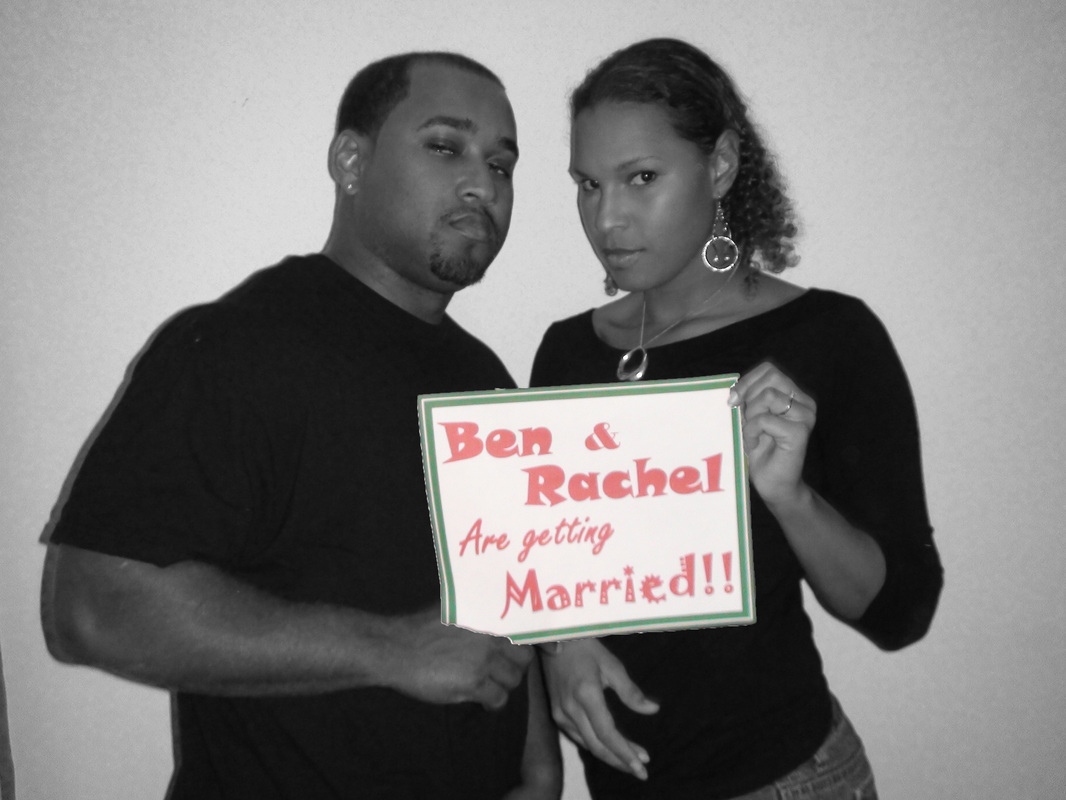
I put the squares and words in the design as place-holders. The words "we're getting hithed" and "save-the-date," etc., are going to be replaced with pictures my fiancé and I holding up signs.
The back of the save-the-dates will give the amounts of the reserved hotel block and the phone numbers for the hotels. I know that some folks just aren't comfortable with computers but will still want to make their reservations as early as possible.
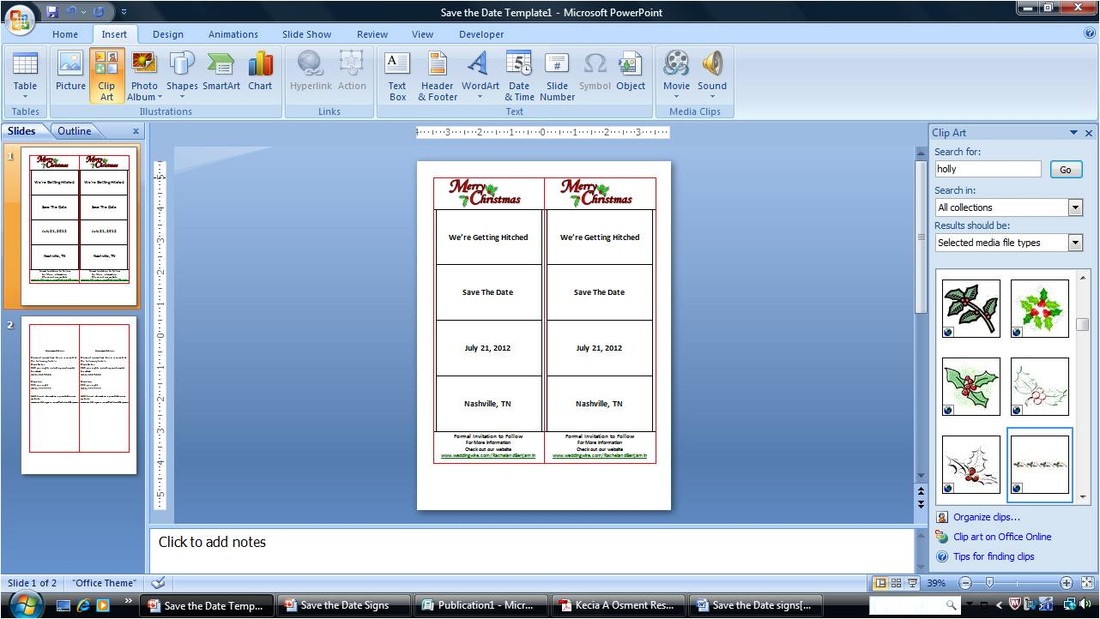
I then decided that I wanted to make the save-the-dates double as Christmas cards, so I added some additional decorations. I wasn't sure what would be the best look, so I tried out a couple so taht I could print mock ups and make a solid decision. The "Merry Christmas" decorations are just MS Clip Art.
The back of the save-the-dates will give the amounts of the reserved hotel block and the phone numbers for the hotels. I know that some folks just aren't comfortable with computers but will still want to make their reservations as early as possible.
I then decided that I wanted to make the save-the-dates double as Christmas cards, so I added some additional decorations. I wasn't sure what would be the best look, so I tried out a couple so taht I could print mock ups and make a solid decision. The "Merry Christmas" decorations are just MS Clip Art.
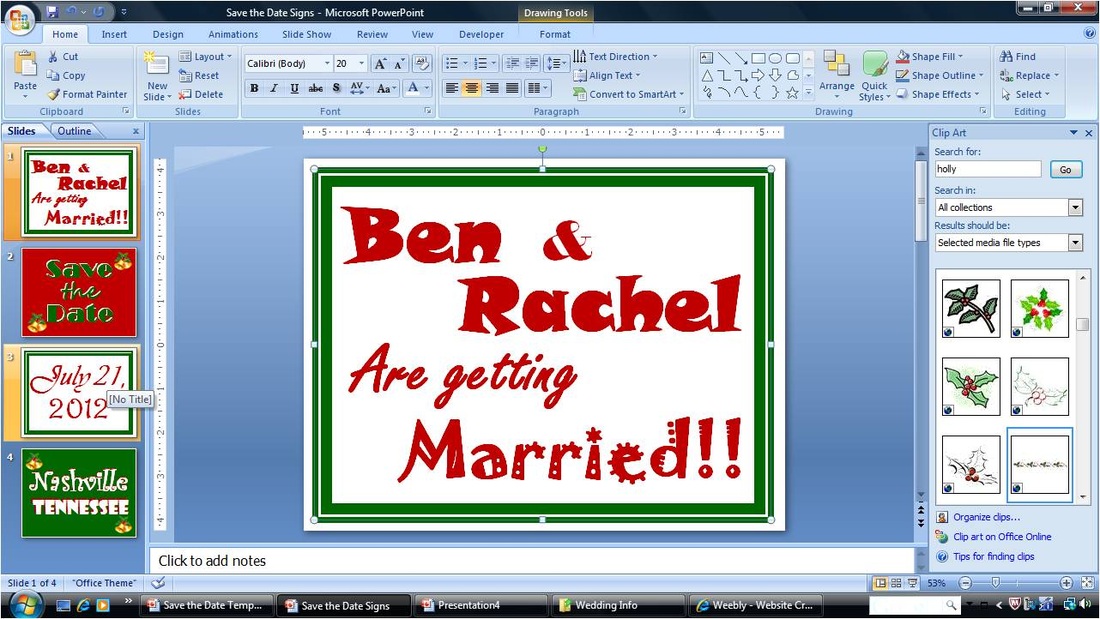
Save-the-date signs
Next up, are the actual signs that we'll be holding in our "photo booth." I also used MS Powerpoint to make these. I do own MS Publisher on this computer, but I've just gotten so used to using Powerpoint for designs that don't require templates, that I hardly ever use it. I did use it to design the envelopes I used to mail the save-the-dates.
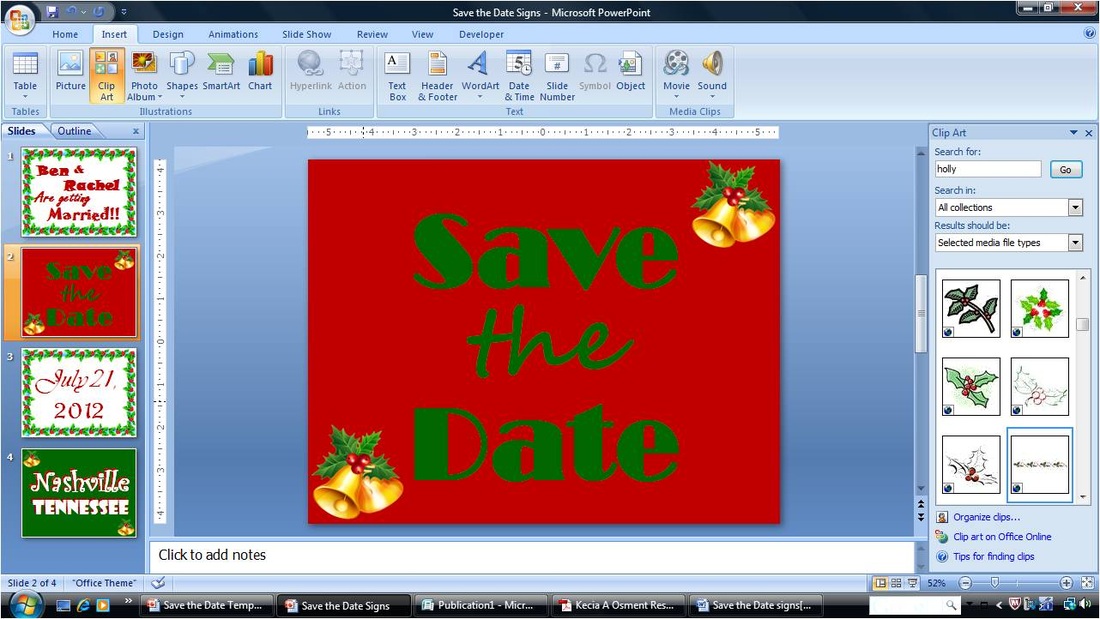
I wanted to make sure that teh signs were legible when photographed. I was worried about the fonts and the size of the signs, since I was printing them on 8.5 x 11 sheets of regular printer paper. Once I printed the signs, I photographed them, added them back into the template and printed the template again.
I decided that the holly leaf boarders got-to go and that I should add in a sizing guide for the size of the sign in the picture into my template so that I know how big the sign has to be in the cropped picture, in order to look good when printed.
I may also replace the initial white sign with a piece of posterboard cut 10 x 13. I may need the additional size for readability.
I may also replace the initial white sign with a piece of posterboard cut 10 x 13. I may need the additional size for readability.
Making our "photobooth strip"
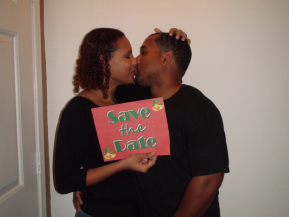
The general idea was simple: take pictures of ourself holding the signs, arrange them vertically, try to make them look like they came from a photo booth. Easier said than done!
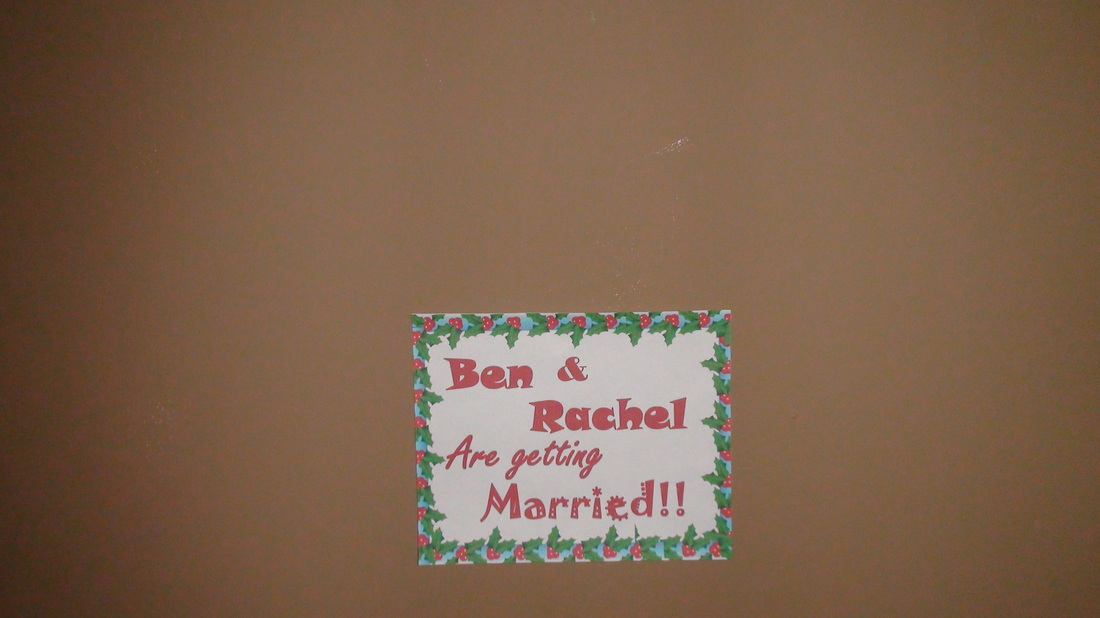
We took about 7 shots with each sign so we'd have plenty of poses to choose from. Our photographer was our 8-year who stood on a step stool to be at eye level.
The pictures were SUPPOSED to have the backdrop of a white wall, but as you can see, some of our favorites included the front door :-/
However, there's Photoshop for that!
I found a tutorial using google that explained how to turn the photo black and white while still keeping the color in the sign.
Click here for instructions
Replacing the background was a little bit harder to find, since the instructions changed based on the verson of photoshop.
I eventually figured that I select our bodies using the select tool (this worked well since we contrast nicely with the white wall), cut (ctrl-x), and pasting us into a picture I took of the blank wall. I did have to do some brightening of the picture, but it was worth it to get the picture we wanted.
The biggest problem I had was that one of the signs didn't appear big enough when printed on the strip. Nothing a little Photoshop can't fix! I just had no idea how. After some frustration, I realized that after selecting the sign, I can stretch it out.
Sounds simple enough, but since the sign is tilted a little and is overlapping with both of our hands, I think I just got lucky.
So after much ado, I'm ready to share the finished product!!!
Sounds simple enough, but since the sign is tilted a little and is overlapping with both of our hands, I think I just got lucky.
So after much ado, I'm ready to share the finished product!!!
Invitations
Once the save-the-dates were printed and mailed (which was no small feat), it was time for the next project. The formal invitations for weddings don't need to go out until 6 to 8 weeks before the wedding, but designing, printing and putting together the invitation takes time.
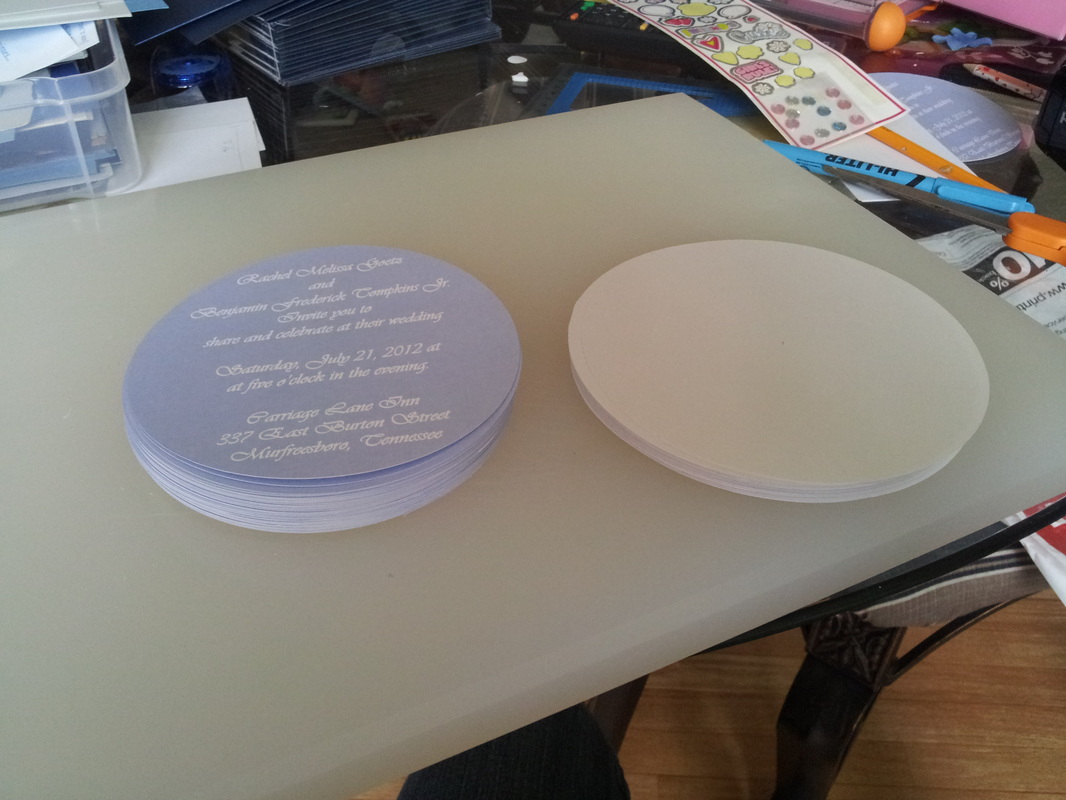
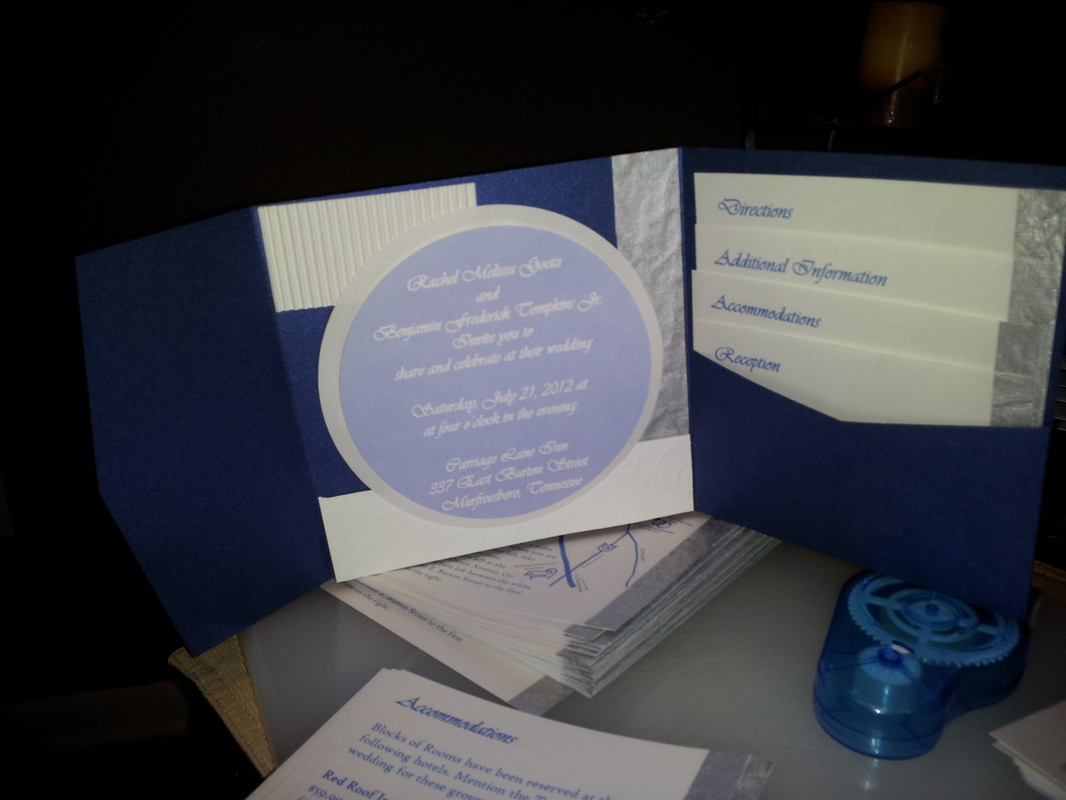
Geometric shapes are part of the "theme" of my wedding, so the invitations feature circles and straight lines (seems common sense right?) It's all about how you put those together that make the feature.
First, the invitation "mat" and info are both cut into circles.
Geometric shapes are part of the "theme" of my wedding, so the invitations feature circles and straight lines (seems common sense right?) It's all about how you put those together that make the feature.
First, the invitation "mat" and info are both cut into circles.

So the there are 4 different textures of paper involved. 3 are for the highlighted strips on the side, then there is a 6 inch circle of metalic white, and then the 6 inch blue circle was printed on to matte picture paper. The blue circle was printed on semi gloss cardstock courtesy of OfficeMad.
So far far in advance, I designed the printer templates for the various sizes and shapes of paper. And what program did I use for this? You guessed it! Trusty 'ol MS Powerpoint!
So far far in advance, I designed the printer templates for the various sizes and shapes of paper. And what program did I use for this? You guessed it! Trusty 'ol MS Powerpoint!
First the circle cutting commenced!
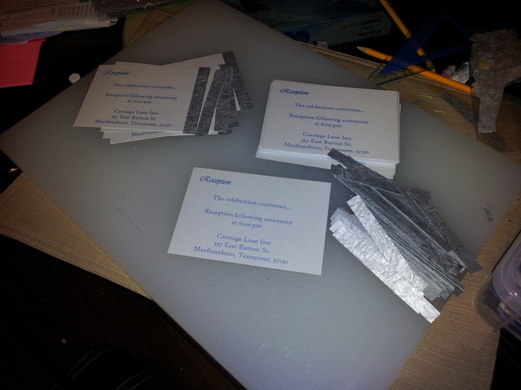
The invitation inserts. The silver strip on the side was a late addition, but was very popular with all viewers.
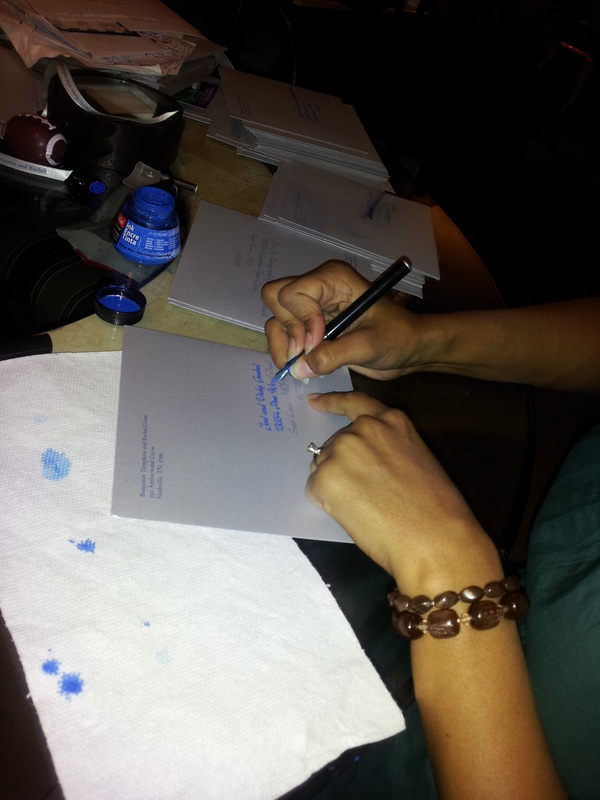
Some people thought this was crazy, but I thought it would be a good idea do do my own caligraphy addressing the invitations. My hand writing isn't that great, so I just printed the font on to the labels and then traced over it with a caligraphy pen.
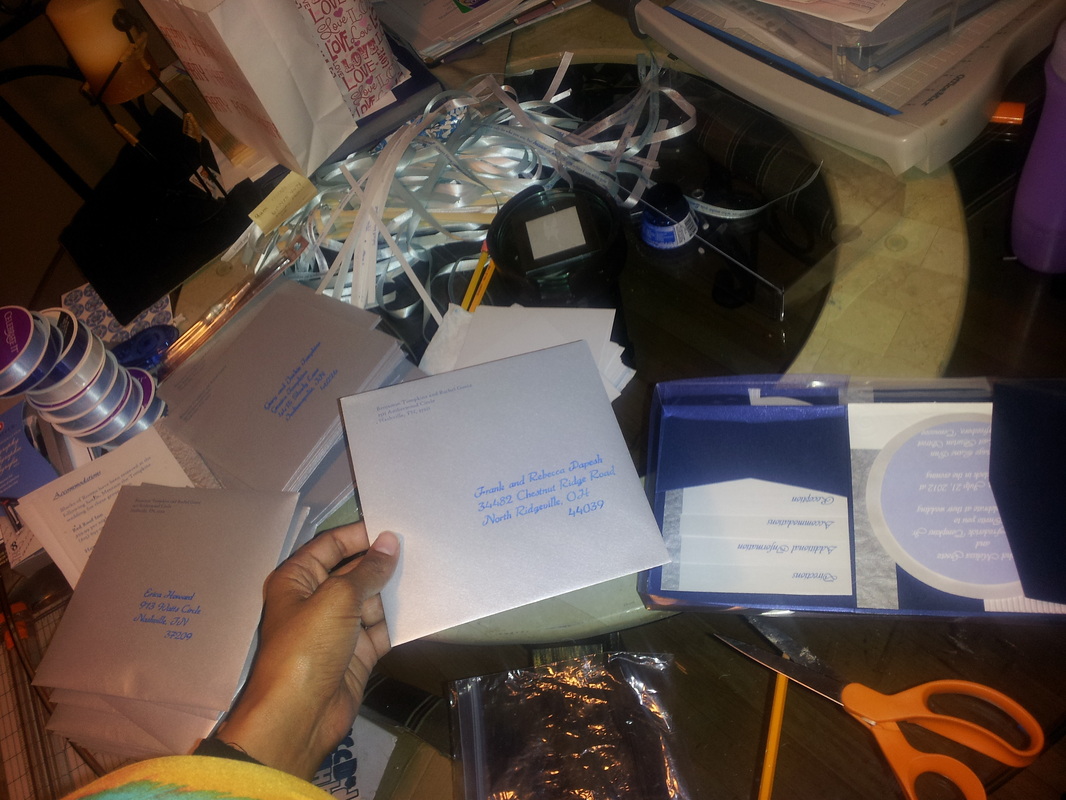
Okay, so finally I had a stack of addressed envelopes and stacked invites. Tons and tons of time put in to these, but it was the perfect custom look that I wanted!
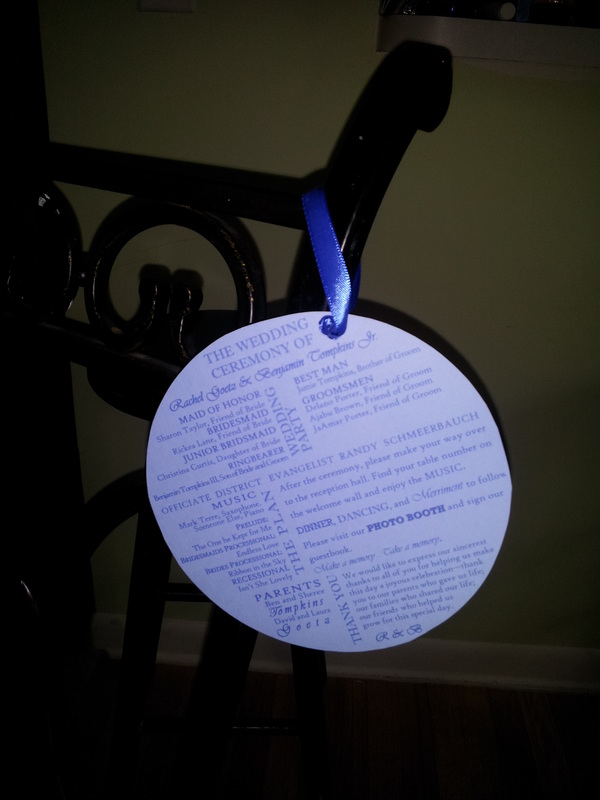
So still keeping with the theme of circles...why not circle wedding programs? I saw this perpendicular layout on a "fan" program and a hanging circle program on anotgher site and thought, why not combine them? The programs will have a ribon strung through one edge and they'll hang on the side of each chair.
Photobooth Sign
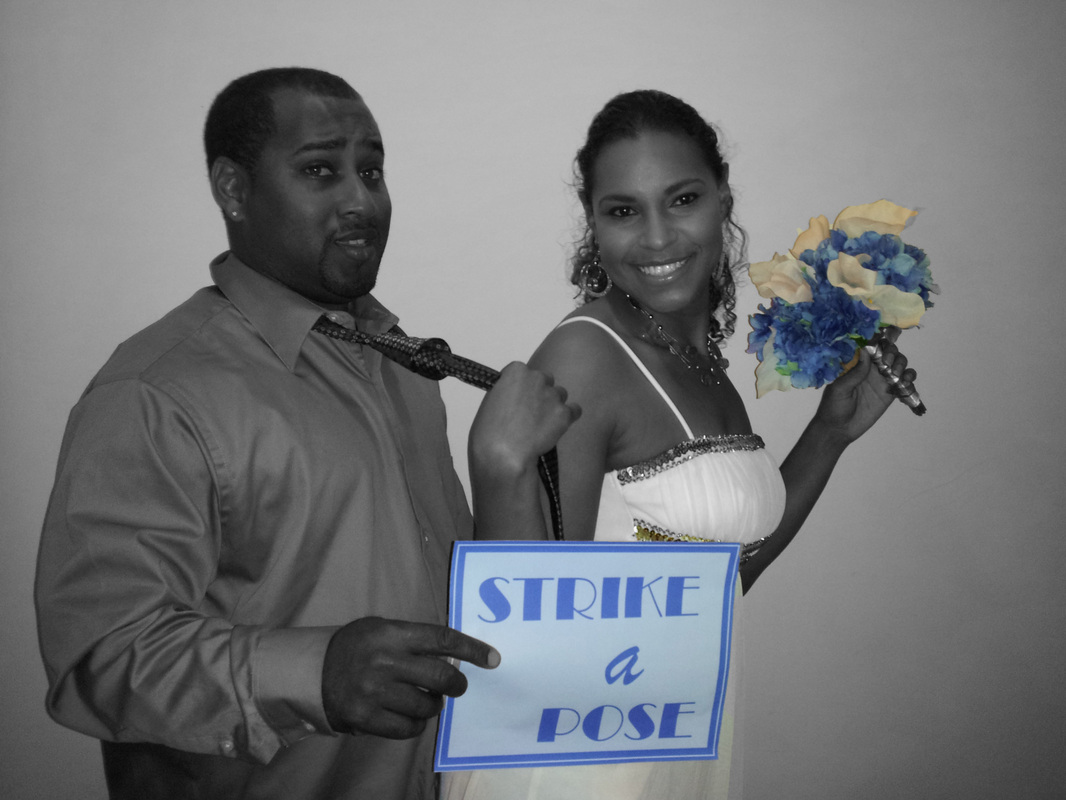
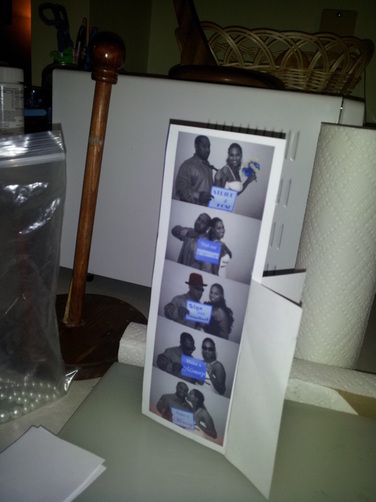
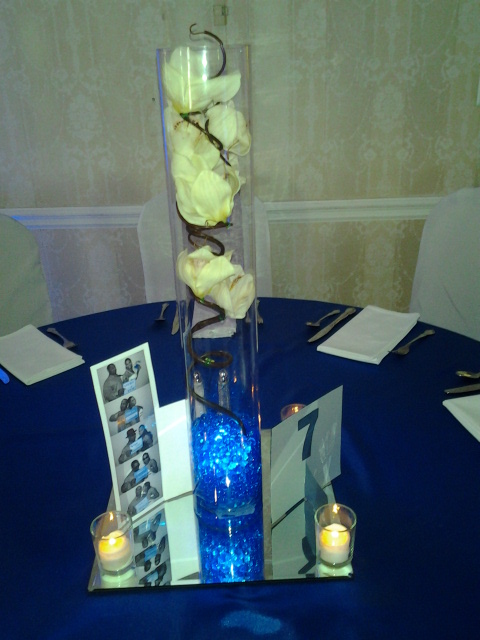
In the spirit of enjoying the photobooth, I decided to place photo strips on each table reminding guests to use the photobooth! Friends and coworkers explained that at their weddings guests either didn't know what the photobooth was for, or lost interest quickly. Therefore, a short and catchy picture might spark their interest.
We took the pictures with my phone, and a little photoship magic highlights the blue sign and blue boquet.
We printed these on photo paper for the slightly larger than photobooth strip size, but we also made a giant one.
Right, in case we missed the others, we made a photo strip out of 8x10 photos.
We took the pictures with my phone, and a little photoship magic highlights the blue sign and blue boquet.
We printed these on photo paper for the slightly larger than photobooth strip size, but we also made a giant one.
Right, in case we missed the others, we made a photo strip out of 8x10 photos.
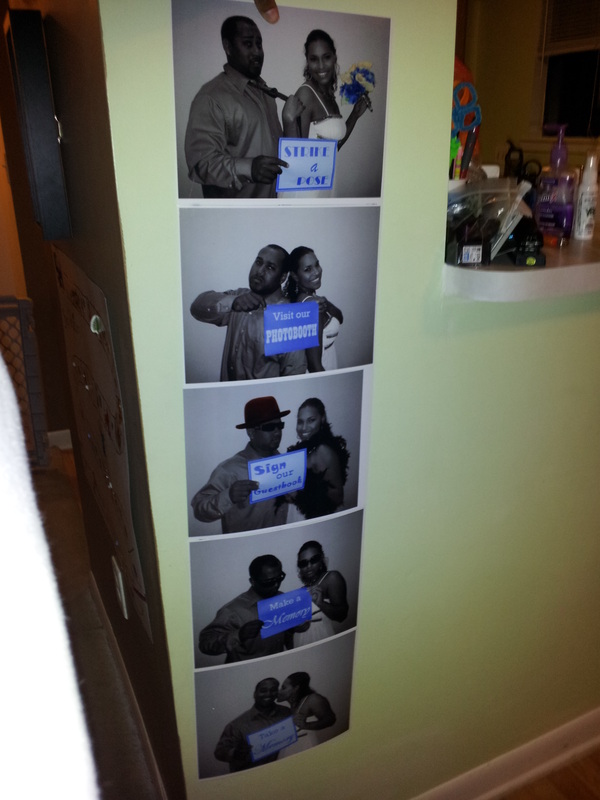
I've been told that the problem with photo booths is that guests don't know that it's there, all the guests use the booth early and then forget about it, or that they don't know that theyre supposed to sign the guest book.
In order to help prevent any misunderstandings, we made a photobooth sign to hang near the photobooth and the table signs to the left.
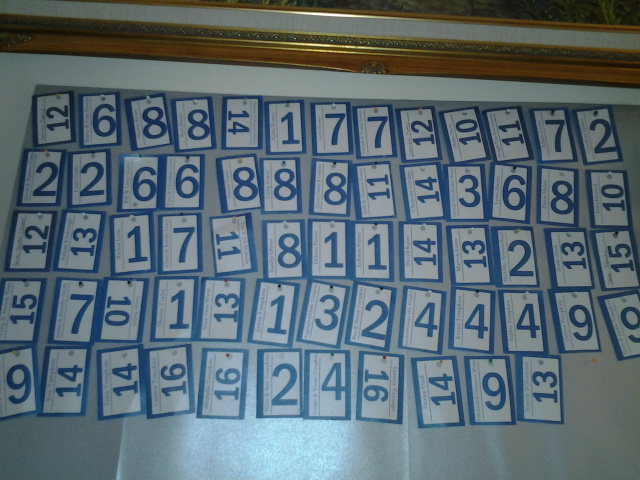
I made the table numbers from remaining card stock. I cut out the numbers by hand.
In order to help prevent any misunderstandings, we made a photobooth sign to hang near the photobooth and the table signs to the left.
I made the table numbers from remaining card stock. I cut out the numbers by hand.
Bar Sign
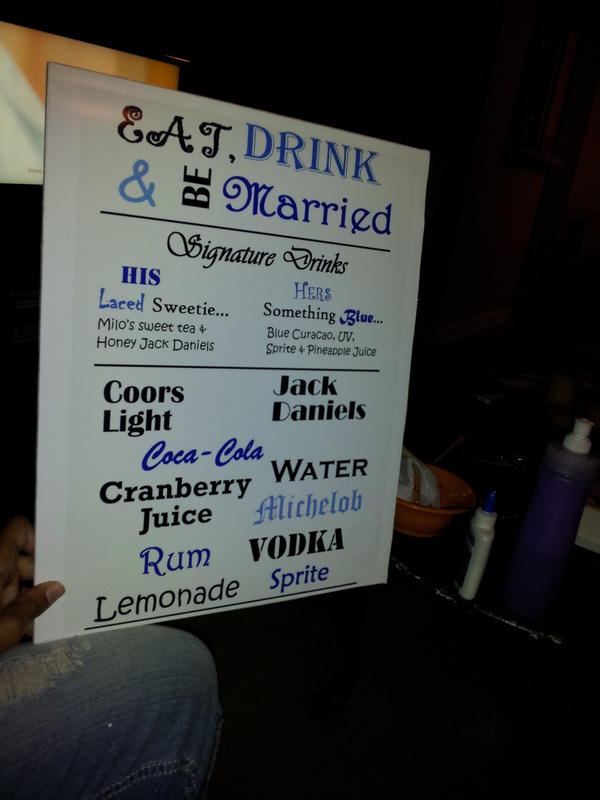
We printed the bar sign as a 12 x 16 photo and then posted it on foam board.
Escort card board. Hanging escort cards on foamboard.
